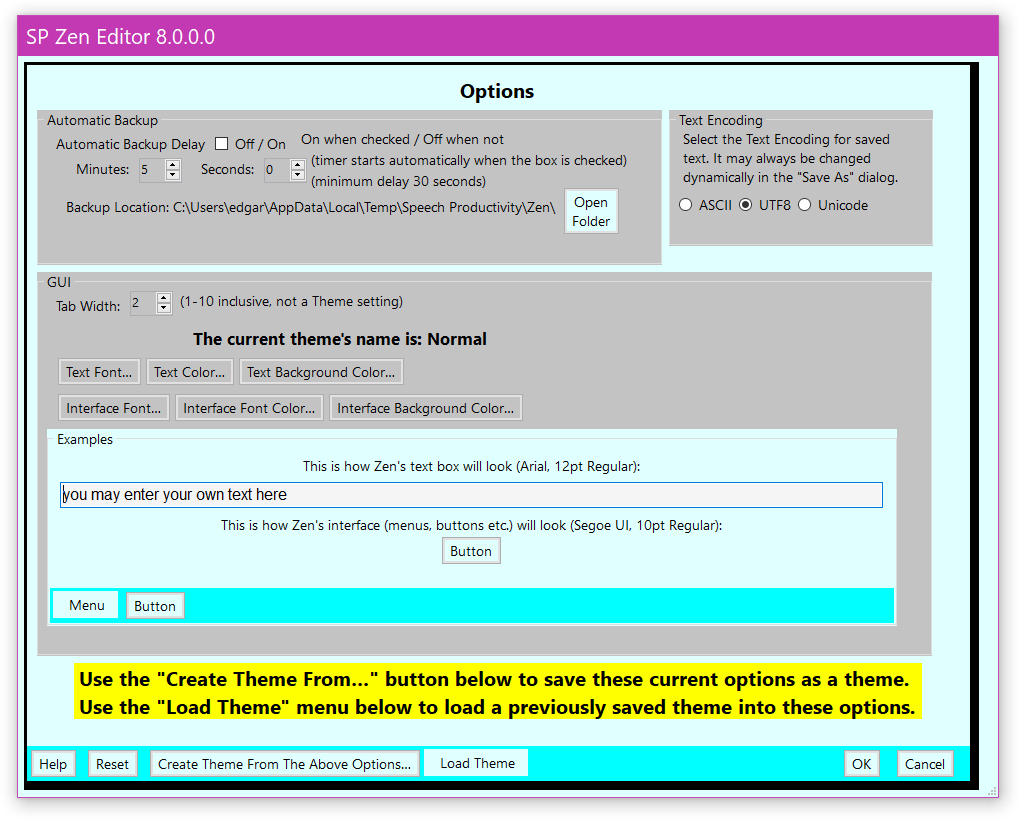
This options dialog allows the user to make changes to the way SP Zen Editor© looks and interacts with Windows.
| Automatic Backup | Text Encoding | |
| GUI Configuration | Textbox Configuration | Interface Configuration |
| The Examples | ||
| The Buttons At The Bottom | ||
| Other Help Pages |
SP Zen Editor©’s Automatic Backup feature, when turned on (use the On / Off checkbox), automatically stores a copy of the current content of the text box using the specified delay. The delay is specified in minutes (0–59) and seconds (0–59) — the maximum delay duration is fifty–nine minutes fifty–nine seconds (almost one hour).
Immediately, when the On / Off checkbox is checked, the current content of the text box will be saved (if there is no content in the text box nothing will be saved). If the On / Off checkbox is checked when SP Zen Editor© is closed Automatic Backup will be turned on the next time it opens. The same delay duration will be in effect.
The settings of the Automatic Backup feature take effect immediately. They are not affected by the “OK” nor
“Cancel” buttons at the bottom of the Options dialog.
When the On / Off checkbox is unchecked, the delay timer will immediately be turned off. The only way to change the
delay duration is to have the checkbox unchecked.
The Minutes: Numeric UpDown widget can be activated by saying "click minutes" (or just "minutes" if Dragon’s Require Click option is turned off). You may then dictate any integer between 0 and 59 or say "press up" or "press down" to change the value.
The Seconds: Numeric UpDown widget operates in the same manner. If you enter an invalid integer the value will be automatically set to the closest correct integer (entering 60 will yield 59, entering -1 will yield 0).
The Open Folder button opens the backup location folder in FileZen (Window)Zen Explorer.
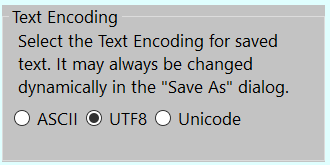
Text Encoding is only used when saving a file. This setting in Options controls the default setting which is selected when the “Save As” dialog opens. The dialog contains these three identical radio buttons so that the encoding may be changed dynamically before saving an individual document. The default is “UTF8”.
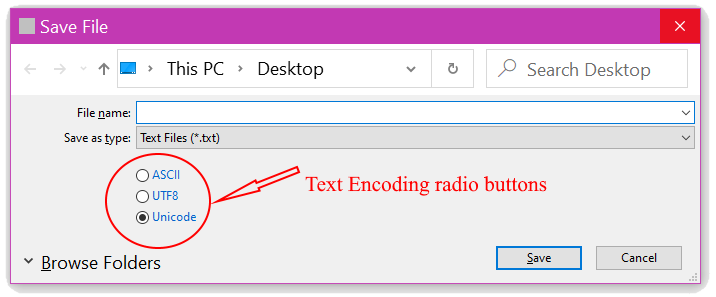
Text Encoding is useful if the file being saved is to be used with an application which does not recognize Unicode. While most modern applications handle Unicode, you might run into an application which opens a Unicode–encoded file and the expected text looks like gibberish, lots of repetitive question marks or empty square boxes. One application which fails to function with Unicode–encoded files is Speech Productivity©’s Enhanced Reader module. You will need to use the ASCII encoding for files which you want to have read from their context menu.
ASCII encoding only allows those letters which are commonly found a typical 101-key American keyboard. The following picture gives a good example of this:
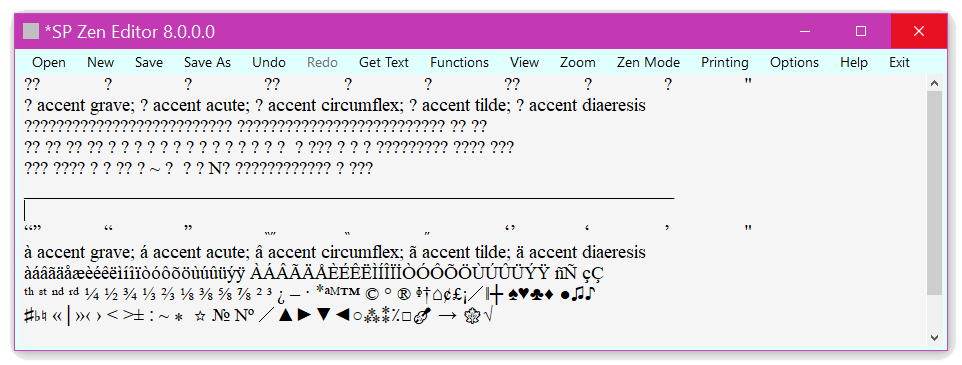
Below the line are a number of common Unicode characters (all ASCII letters can be found in Unicode); above the line is what they look like when saved as ASCII.
Configuring The GUI
Configuring The Textbox
There are three buttons which control the look of the text box: Text Font…; Text Color…; and Text Background Color….
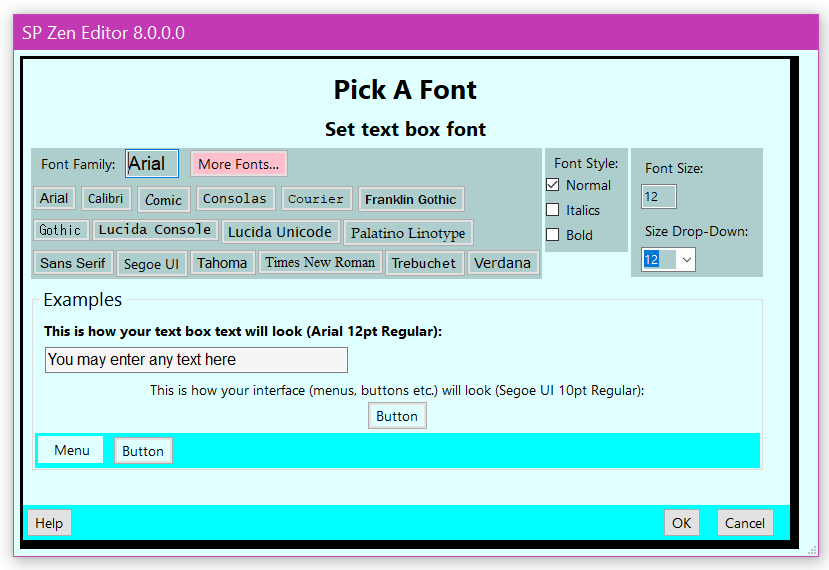
The Text Font… button will open a Dragon–friendly Font Picker dialog which will allow the user to choose a font (including font family, size and style) for the text in the text box. A number of common fonts are available for immediate access via button clicks; all fonts installed on the system are available through a helper application using the More Fonts… button.
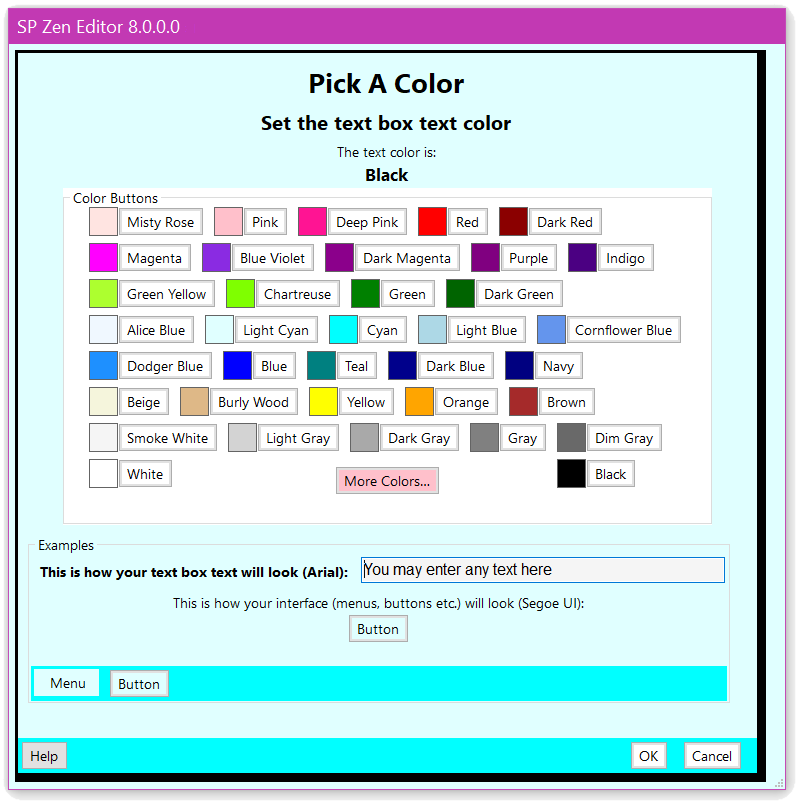
The Text Color… button will open a Dragon–friendly Color Picker dialog which will allow the user to choose a color for the text in the text box. A number of common colors are available for immediate access via button clicks; all colors known to the system are available through a helper application using the More Colors… button.
The Text Background Color… button will open a Dragon–friendly Color Picker dialog which will allow the user to choose a color for the background of the text box. A number of common colors are available for immediate access via button clicks; all colors known to the system are available through a helper application using the More Colors… button.
Configuring The Interface
The “Tab Width” value is not part of the “Theme”. This value controls the width of a tab when inserted into the text. A value of “1” will results in a gap approximately the width of four “M”s (“MMMM”); “2” will yield about eight “M”s (“MMMMMMMM”).
There are three buttons which control the look of the interface (menus, buttons, labels etc.): Interface Font…; Interface Font Color…; and Interface Background Color….
The Interface Font… button will open a Dragon–friendly Font Picker dialog which will allow the user to choose a font (including font family, size and style) for the interface text. A number of common fonts are available for immediate access via button clicks; all fonts installed on the system are available through a helper application.
The Interface Text Color… button will open a Dragon–friendly Color Picker dialog which will allow the user to choose a color for the interface text. A number of common colors are available for immediate access via button clicks; all colors known to the system are available through a helper application.
The Interface Background Color… button will open a Dragon–friendly Color Picker dialog which will allow the user to choose a color for the background of interface.
The Examples: Textbox, Menu And Buttons
There is a text box which gives an example of how the text will look in the editor. There is also a non–functional menu and a two non–functional buttons to demonstrate what the interface will look like given the choices made above.
Any text may be entered here. This box will remember its contents until SP Zen Editor© closes.
The Buttons At The Bottom

There are five buttons and one menu at the bottom of the dialog: Help…; Reset; Create Theme From The Above Options…; Load Theme (the menu); OK and Cancel.
The Help… button will open the documentation for this dialog in your preferred browser.
The Reset button will reset all SP Zen Editor© defaults, close the Options dialog and reformat SP Zen Editor© to its default configuration. This will have no effect on stored Themes.
The Create Theme From The Above Options… button will open the Theme Creator dialog with the above options for text and interface font and colors preconfigured.
The Load Theme menu will load any selected Theme into the dialog values above where they may be modified if desired.
Loading a Theme here does not change the main editor window unless the OK button is used to dismiss the dialog. Any changes made here in the Options dialog to a loaded Theme will not affect the loaded Theme. If you wish to change the design of an existing Theme you must do so in the Theme Editor.Save all
The OK button will make all changes and dismiss this dialog.
The Cancel button will ignore all changes and dismiss this dialog.
The Automatic Backup feature is not affected by the “OK” nor “Cancel” buttons at the bottom of the Options dialog.